Step 1: Configuration of the Opt-In form
Please follow these steps:
| 1. | Before you can inlcude the form on your website, we first have to configure the Opt-In form. In order to do this, please open the file "user_config.php" located in the "optinssm"-folder (you can find this folder in your SmartSerialMail installation folder). In this file we can adjust the form fields which the SmartSerialMail Opt-In form will display and their labels, you can also change the SmartSerialMail inbox form which you want to collect your subscriptions. |
| Open the file with any editor of your choice, e.g. "WordPad". |
| 2. | First of all you can set the e-mail address of your SmartSerialMail inbox. For this you have to adjust the following line of code, by changing the e-mail address accordingly: |
 |
| This is the e-mail address to which any of your subscription confirmations will be send and from which you can later on let SmartSerialMail automatically collect them. |
|
You have to set "Trusted Subscriptions From Address" to the e-mail address from which your mailserver sends the subscriptions to your inbox. Otherwise SmartSerialMail could probably collect the wrong subscriber data.
(For more information see chapter "List Management"->"Subscriptions") |
| 3. | In the next line you can configure the Opt-In form fields. This happens by adding (or removing) comma seperated elements to the “optin_form_fields”-array of the following form: |
| “SmartSerialMail placeholder variable name", e.g. "First_Name" followed by an "equal"-sign and a "greater"-sign "=>” and the "Field-Description", e.g. "Your first name:": |
 |
Please be aware, that the variable names of your SmartSerialMail placeholder have to be exactly the same as the ones you use in SmartSerialMail, and that they have to exist respectively.
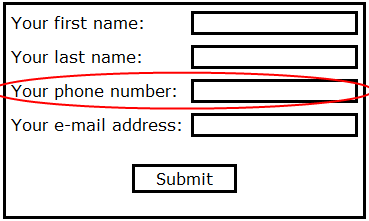
If you for example have a recipients list which additionally has a row which holds the phone number of your subscribers named "Phone_Number", you have to it to the “optin_form_fields”-array as follows:
![]()
This will automatically add a field with the name "Phone_Number" and the label "Your phone number:" to the Opt-In form:

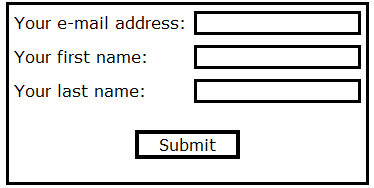
The order of the elements in the “optin_form_fields”-array is the same as the order in which the Opt-In form will be created. This means, if your array contains the fields Email, First_Name, Last_Name,
the Opt-In form will look like this:
so sieht Ihr Opt-In Formular später wie folgt aus:

If you have added all desired fields you can now pass to step 2 and include the form in the website of your choice.
Step 2: Inclusion of the Opt-In form in your website
Please follow these steps:
| 1. | Log in to your webserver via web-interface or ftp access. You can use any ftp client software, like the free of charge program FileZilla. If you have any questions concerning this, please contact your provider directly. |
| Copy the whole content of the "optinssm"-folder to the folder of your web server which contains the website in which you want to integrate the Opt-In form (e.g. "htdocs"): |

| 2. | Copy the following code to the position in your html or php file, at which you want to include the Opt-In form: |
<?php include("./optinssm/subscription_form/subscription_form.php")?> |

|
If you changed the name of the folder which contains the Opt-In form or it is located in another directory than "optinssm", you have to adapt the link accordingly. |
| 3. | Change the file extension of your site from ".htm" or ".html" to ".php" if necessary (right-click on the file, then choose "Properties): |

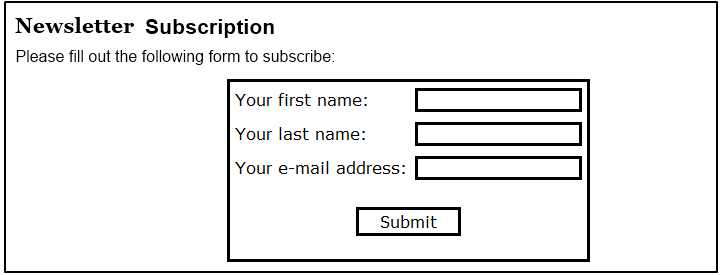
| 4. | If you now open the website in which you included the form with your browser, the Opt-In form should be displayed: |

|
Thanks to the transparent background color the Opt-In form will automatically adapt to the design of your website. |