Configuration of DataCentral
Basic Configuration
Database Connection
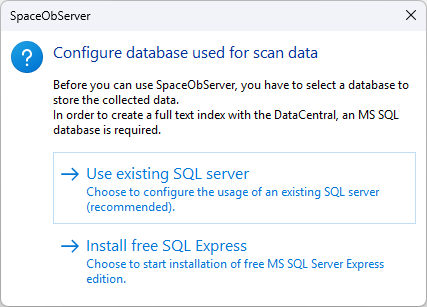
When you start SpaceObServer DataCentral for the first time, you will be asked to connect to a database.
To do this, select the option “Use existing SQL server”.
Note
For testing purposes you can choose the option “Install free SQL Express” as mentioned in Database. If you do so, you can skip to the chapter Create First Index.
After this, simply follow these step-by-step instructions:
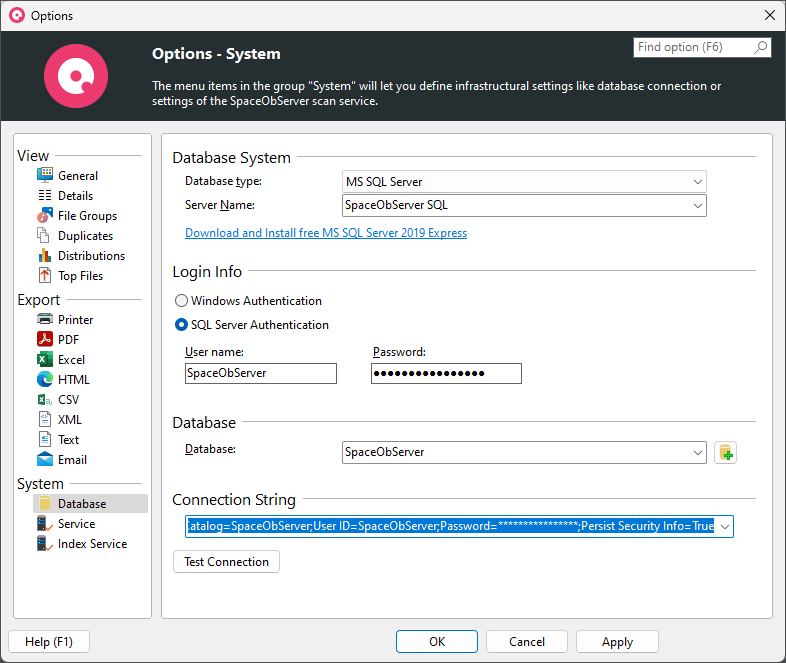
First, choose “MS SQL Server” or “PostgreSQL” as database type.
(Skip in case of MS SQL Server) Click on the button next to the database type and select the unicode provider and port for the database.
Enter the SQL server name that hosts the database.
Now enter your authentication information for the database or use Windows authentication for Microsoft SQL Server.
Enter the name of your database.
Use the “Test connection” button as soon as you have specified all 5 previous settings to check whether the connection to the database can be established.
After the connection test was successful, save the settings by clicking on “Apply”.
Create First Index
After the connection to the database is configured, you can now choose a storage system that you would like to scan and to index. To do this, click on the “Scan” > “Add Scan” tab.
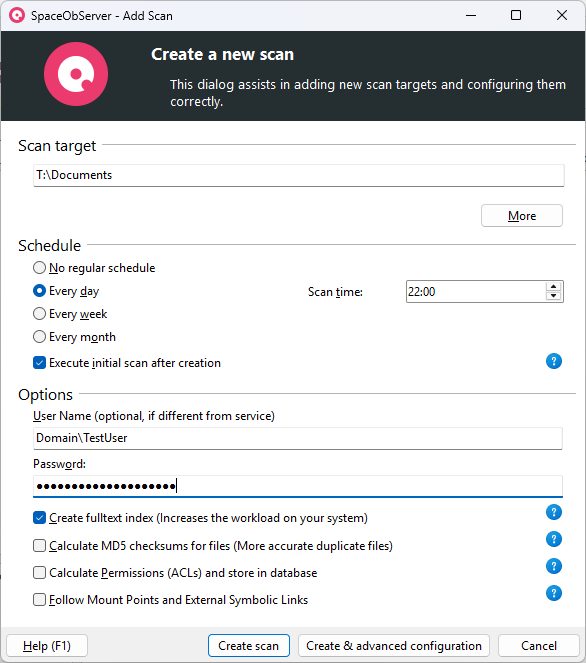
Now enter the UNC path to the drive or folder you want to scan and index. Click on “More” to open an input mask that simplifies your selection and on “Less” to see the original options.
Note
DataCentral does not create a full-text index for SharePoint and instead accesses the index that SharePoint itself provides. You can therefore disregard an existing SharePoint server when indexing.
Next, set a suitable schedule for updating the scan and therefore also the data in the index.
We recommend frequent updating for the best search results. However, you should consider the time it takes to update your database and index in order to determine the optimal interval for you.
Note
The initial scan and indexing usually takes longer than all subsequent ones, as the first scan and indexing need to deal with all the files, but later scans and indexings only take incremental changes into account.
Also make sure that the option “Create fulltext index” is activated to provide file content search results to connected UltraSearch users.
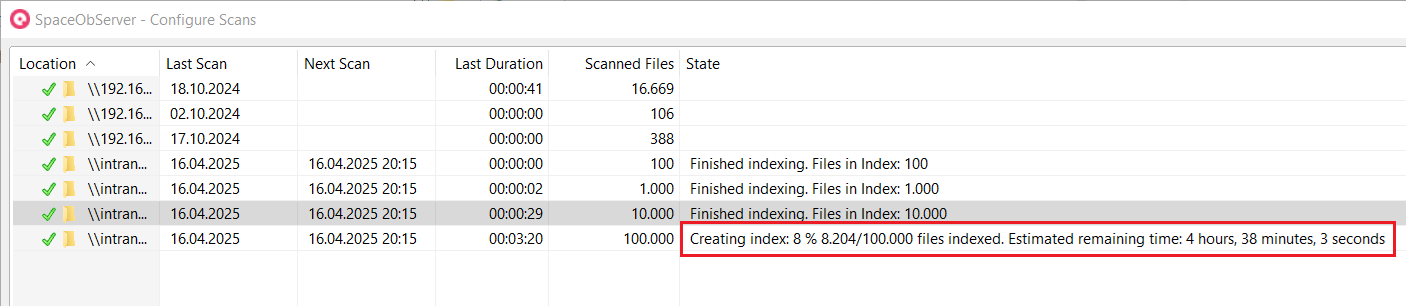
When the scan (initial scan or update scan) is finished and the option “Create fulltext index” is activated, the indexing starts automatically.
The current progress of the indexing and an estimation of the remaining time is visible in the “State” column of the “Configure scans” window:
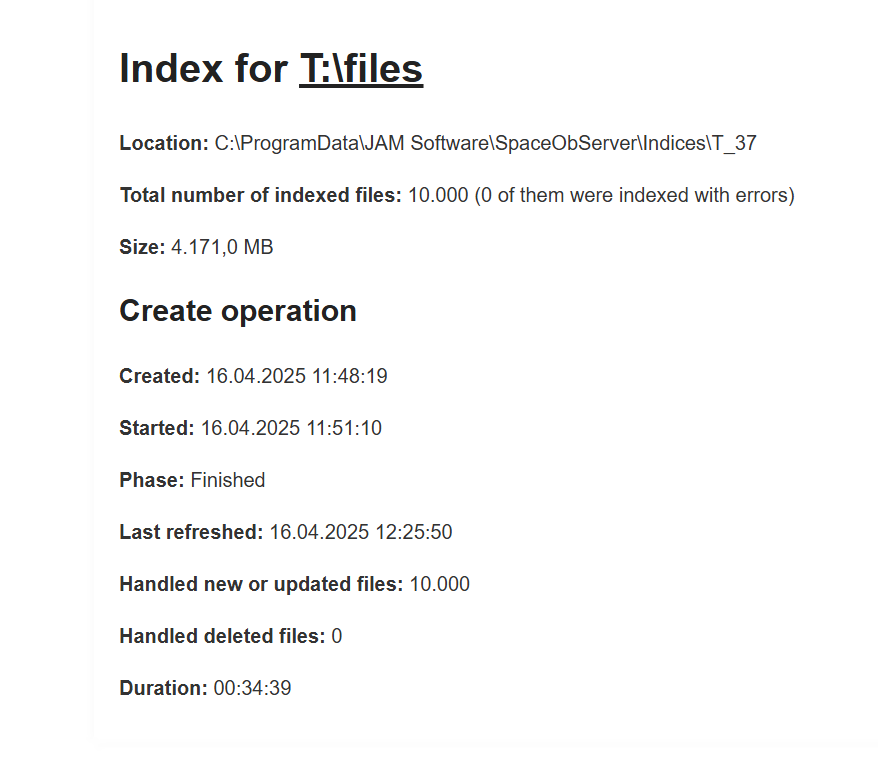
For further information about the index (e.g. index size, location, most recent index operation, …), the “Configure Scans” window has a “Show Statistics” button in the “Scan Options” tab:
Further useful Tips:
If a drive to be indexed is an NTFS drive, you should check whether you want to activate the option Follow mountpoints and external symbolic links.
Under “Update Options”, you can adjust the schedule for scan/index updates later on. It is also possible to use a live update for NTFS file systems using the change journals in case of local storages.
Even more specific options can be found in the expert options, where you can, for example, specify the user context, which should be used for the specific scan and indexing.