Installation
To install SpaceObServer Web Access, please execute the setup file SpaceObServerWebAccess-Setup.msi or SpaceObServerWebAccess-Setup.exe on your machine and follow the instructions. The setup will copy the necessary files to your hard disk. The SpaceObServer Web Access may be uninstalled using the Programs and Features applet in .
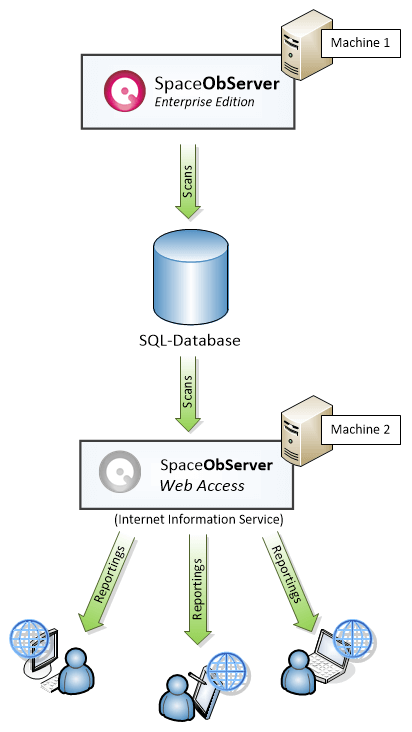
The SpaceObServer Web Access is an Add-on for the SpaceObServer, but does not need to be installed on the same machine (stand-alone). Only the connection to the database is required (either over the network or local), where the SpaceObServer stores the scans:
Installation Steps
The software requires the .NET Framework 4.8. Please install the framework before you start the setup.
Start the setup file on the target machine.
Agree to the license agreement by checking the box and click Install.
Type in the installation key or choose the trial mode. You can get the installation key on our homepage https://www.jam-software.com in the customer area.
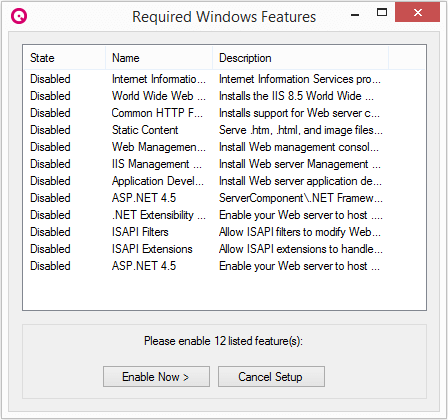
- In the next step, the setup reviews if the required features are activated. If this is not the case, then the missing features will be displayed with a short description: Press the Enable Now button to enable the missing features. The process may take a few minutes to complete.
- In the next dialog, you can configure the website:
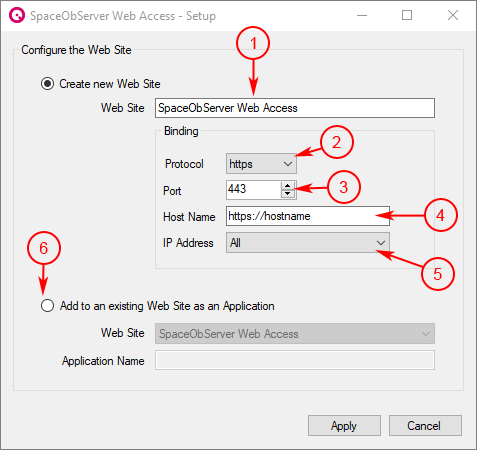
The display name of the website.
The protocol.
The port of the website (e.g. https://hostname:443).
The hostname is the URL where you can access the SpaceObServer Web Access in the browser. Please make sure that the address is registered in the DNS server.
You can restrict the IP-address where the SpaceObServer Web Access is accessible (e.g. http://192.168.178.1). Choose the default value All to allow all addresses.
Alternatively you can add the SpaceObServer Web Access as a web app to an existing website. You can change all these configurations in the IIS-Manager after the installation. If all options are set up, please press the Apply button.
- The SpaceObServer Web Access has an administrator backend which is accessible at the URL http://hostname/admin. Use the dialog to select a security group that is allowed to access the administrator backend:
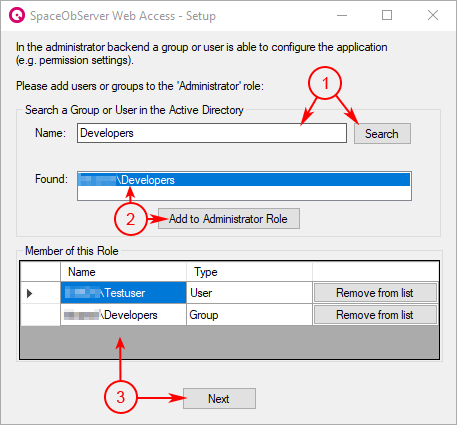
Please enter the name of a security group or a user account and start the search using the Search button. It is also possible to search in combination with a domain by the following pattern:
DOMAIN\GROUPNAME.When the search found a user or security group in the Active Directory, then the result will be listed in the select box. Select and apply the entry using the Add to Administrator Role button.
The selected security group or user will be displayed in this list. Click the Next button to grant all listed accounts access to the administrator backend.
Note
After installation, you can invoke this dialog from the Windows start menu again. In addition, you can change the member of the Administrator role in the administrator backend.
In the next dialog, you can choose the database where the SpaceObServer has stored the scans. The SpaceObServer Web Access creates the reports from this source and provides them over the network. You can decide between SQL Server Authentication (recommended) and Windows Authentication:
SQL Server Authentication
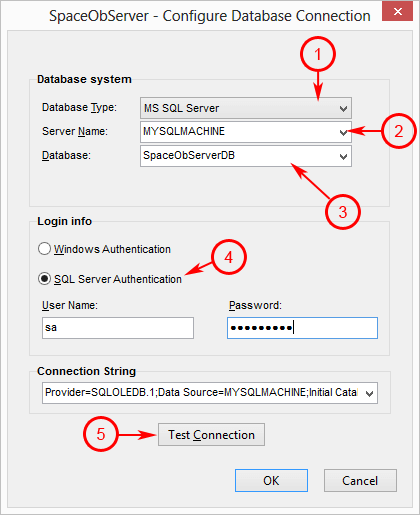
Choose the type of the database.
Enter a server name here. Alternatively you can enter an IP-address.
Enter the name of the database.
Choose SQL-Server Authentication and enter the username and the password.
Test the connection to the database using the test button.
If the database connection is successful, then press the OK button.
Windows Authentication
Warning
Using Windows Authentication for the database connection is not recommended. If you choose this method, you must complete the following additional manual steps:
Open the IIS-Manager (inetmgr).
- Navigate to :
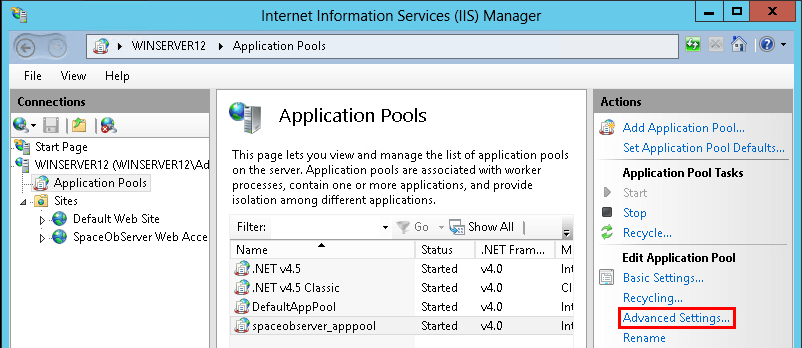
- Click the … button for the Identity entry:
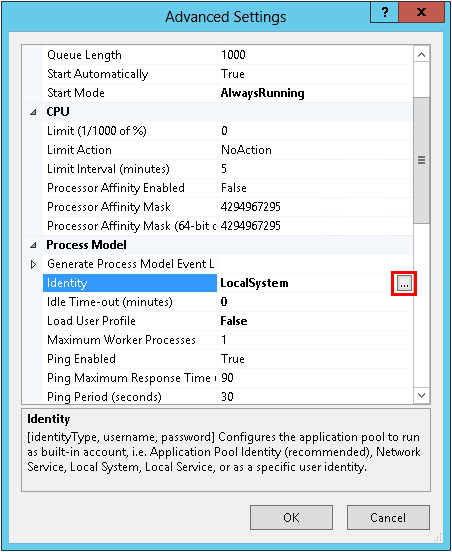
- Choose Custom account and click the Set button. After that, enter the Windows account you want to use for the connection to the database and click the OK button. Now the Application Pool has the identity
IIS APPPOOL\spaceobserver_apppool, which needs to be granted additional permissions by the following steps. 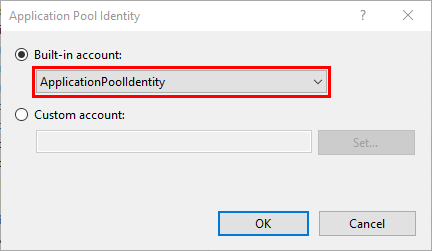
- Choose Custom account and click the Set button. After that, enter the Windows account you want to use for the connection to the database and click the OK button. Now the Application Pool has the identity
Grant the Application Pool
IIS APPPOOL\spaceobserver_apppoolaccess to the following folders:C:\Program Files\JAM Software\SpaceObServer Web AccessC:\ProgramData\Jam Software\SpaceObServer Web Access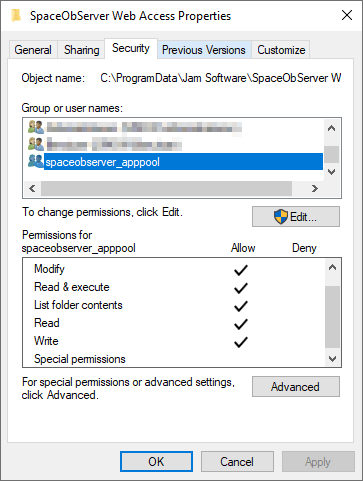
Grant the Application Pool access to COM:
Open the Component Services (dcomcnfg).
In the tree, open the context menu of My Computer and select Properties.
In the COM Security tab, in the last section, select the Edit Default… button.
Add the application pool
IIS APPPOOL\spaceobserver_apppooland grant permissions Local Launch and Local Activation: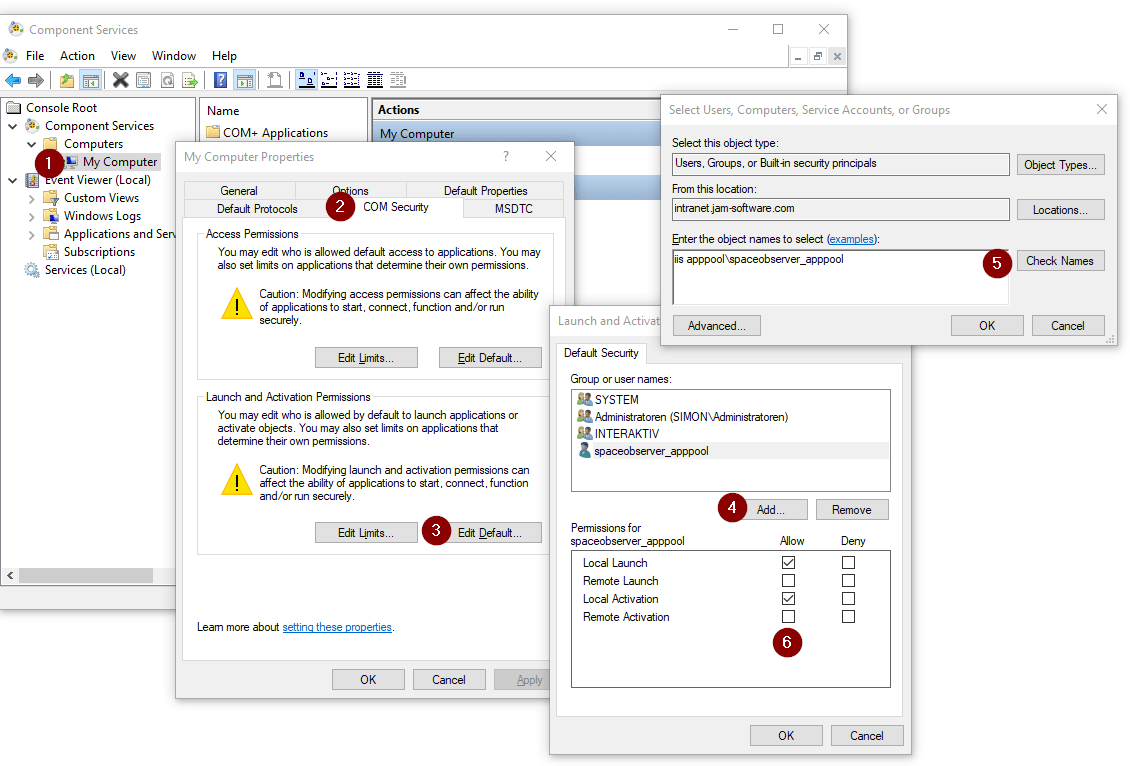
Grant the application pool access to the database:
Start the Microsoft SQL Server Management Studio.
Navigate to and open the context menu of the Logins entry. Select New Login….
Add the user
IIS APPPOOL\spaceobserver_apppool. If you are using a remote database, add the userDomain\ServerName$instead.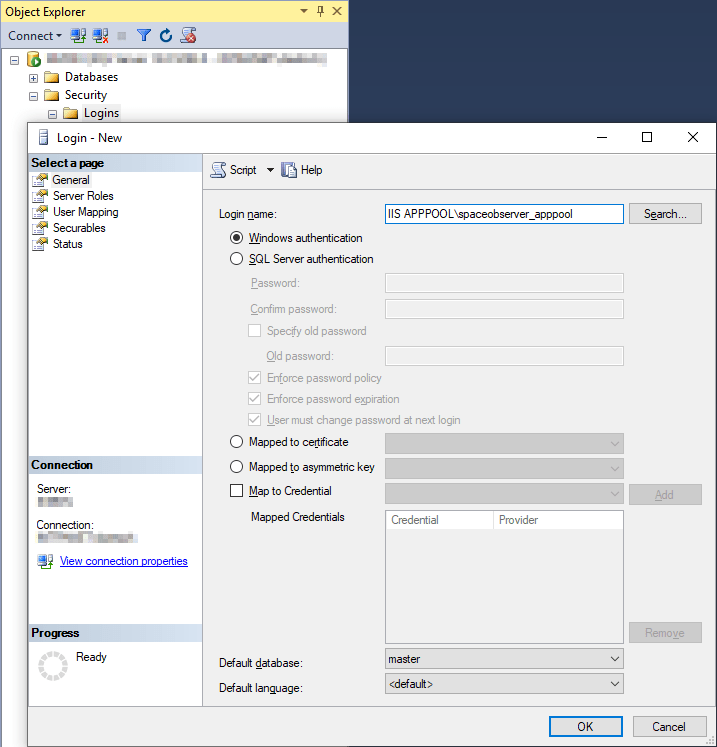
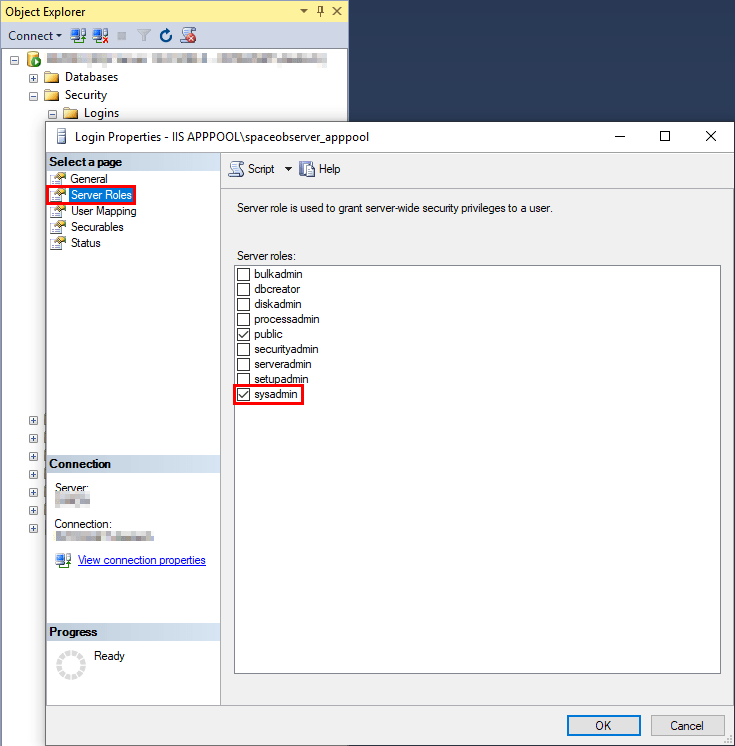
In Server Roles please select sysadmin and apply the settings by pressing OK.
Final Steps
- The next dialog shows the URL where the SpaceObServer Web Access is accessible in the browser. You can copy the URL and paste it in your browser. The dialog also shows the URL to the administrator backend:
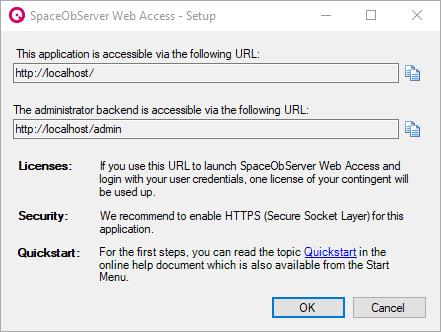
The final dialog box completes the installation. You can find information how to get started with the SpaceObServer Web Access in the Quickstart chapter.
Important
We strongly recommend enabling HTTPS (Secure Socket Layer) for SpaceObServer Web Access to ensure secure communication between clients and the web server.
Tip
If SpaceObServer Web Access does not work with Windows Authentication, use SQL Server Authentication (recommended) instead. In the Advanced Settings of the Application Pool spaceobserver_apppool, set the Identity to LocalSystem.