PDF
Configure the PDF file report of TreeSize.
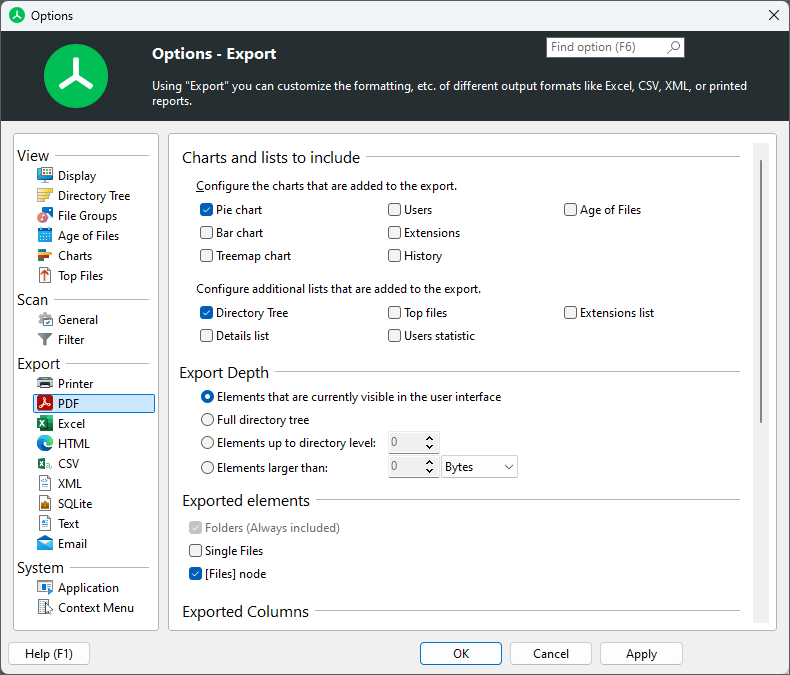
Charts and lists to include
Configure the charts and lists that are added to the export
Check all the different chart types and list types that shall be included in the report that will be printed.
Export Depth
Elements that are currently visible in the user interface
Only the expanded/visible parts of the Directory Tree will be printed.
Full directory tree
If this option is selected, the complete Directory Tree will be printed.
Elements up to directory level
Allows to restrict the amount of data that is printed to a certain level.
Elements larger than
Only elements that have a certain minimum size will be printed.
Exported Elements
Folders only
If this option is selected, only folders will be printed.
Folders and [Files] item
If this option is selected, single files will not be printed. Instead, their values such as “Size” and “Allocated” will be aggregated into a special node “[Files]”.
Folders and single files
If activated, single files will be printed as well. This may result in very large reports compared to exporting the files in a grouped view (see option above).
Exported Columns
Use the column list to specify which information shall be included in printed reports. A list of all available columns with their descriptions can be found in Available columns.
Use same columns as in details view
Activate this option if you want to use the same columns that are currently used in the details view.
Use custom column settings
This option allows for a fully customizable selection of columns for this particular export. You can change the size for each column individually.
Formatting
Use bold text and colors for printed reports too
Turn this option on to apply the settings for bold folder names for printed reports.
Setup
Print Setup…
Opens a dialog that allows to select the default printer, as well as the size and orientation of the printed report.
Page Setup
Margin Left/Top/Right/Bottom
Change these margins to increase or decrease the spacing that is left near the edges of the report.
Page orientation
Use “Portrait” for a vertically aligned report, or “Landscape” for horizontal alignment.