Although there are different kinds of conditions, we'll focus on defining a new, simple condition here. In order to define a new condition, click on the 'New Condition' button in the toolbar of the dialog.
You may add as many conditions as you like to a sensor. That's especially useful, if you want to check several parameter of the sensor's measurements separately and you want to apply different actions for different situations independently from other conditions.
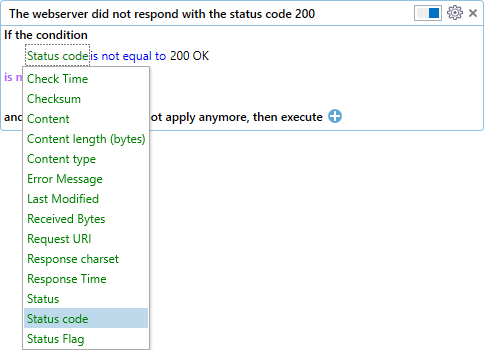
Such a condition can be thought of operating from 'left to right' in an 'if... then' fashion. First you choose one of the fields the sensor collects:
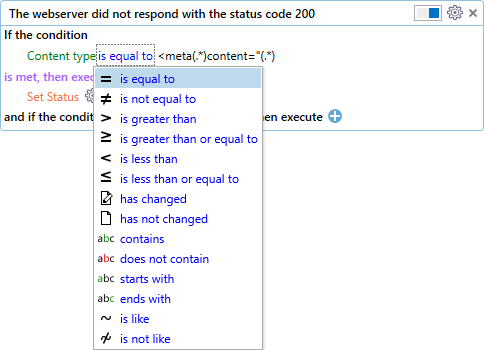
The comparison operator adapts to the type of property that was chosen. In the case above an enumeration type ("Status code") was chosen and the drop-down menu allows the condition to check for equality or change. For the numeric type for example additional operators will be available, e.g. less than, greater than.

Enumeration operators

Numeric operators
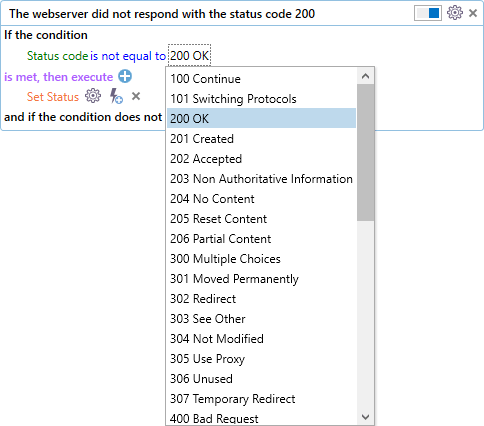
Like the comparison operator field, the value field also changes depending on the type of the chosen property. The value field will be a drop-down menu with distinct values, such as "OK", for an enumeration type, it automatically becomes a normal input field in which you can enter a user-defined comparison value when you want to check a text type.
This is very useful for enumeration types, e.g. to quickly select the right one out of a huge set of possibilities. For example the "HTTP Status code":
For strings being collected by the sensor the condition also allows you to check for containment of a substring, or using a regular expression to check for a specific match criterion:
You can choose between multiple evaluation options. They define how the associated action(s) should behave when the condition is met. There are 4 different possibilities:
•"If the condition is met, then execute"
The action is continuously executed, independent of previous results. This is the default behavior for all conditions.
•"If the condition is met the first time, then execute"
You will be notified once when the conditions matches, and then again only when the condition, at a minimum, is not met and then another action will take place. This reduces the amount of messages in your mailbox when an email action is defined.
•"If the condition is met x times in a row, then execute"
It's your choice how often a condition must match until the action is executed, independent of previous results. For example, this can be useful for a web server that times out although the server is functioning normally.
•"If the condition is met x times in a row, then execute once"
It's your choice how often a condition must match until the action is executed once. For example, this can be useful for a web server that times out although the server is functioning normally.
Apart from the possibility to execute an action when a condition matches, there is also the possibility to execute an action when a condition does not match anymore.
To get this behavior, you need to add an action below "and if the condition does not apply anymore, then execute".
Via the configuration button next to the delete icon, you reach settings for exclusion times.
With the exclusion times, you can configure time spans during which the condition is not triggered. For example, this is helpful when monitoring a workstation, which is offline beyond the working time. This way you can prevent unnecessary/wrong error messages.
You can configure on which days and in which time spans the condition should not be processed.
Read further to find out how to create a notification (e.g. email) if the condition you created happens to match.