Installation
To install SpaceObServer execute the setup file and follow the instructions. The minimum requirements are Windows Server 2016 / Windows 10 as well as the .NET Framework 4.8, which will be installed automatically when missing. The setup program will copy the necessary files to your hard disk and will create a new program group in the Windows Start menu. No system restart is needed after the installation. SpaceObServer can be uninstalled using the Software applet in the Windows Control Panel. You will find the license key for the registered version on the license document (PDF) sent to you after the purchase. During your maintenance period the key will be provided in your customer area.
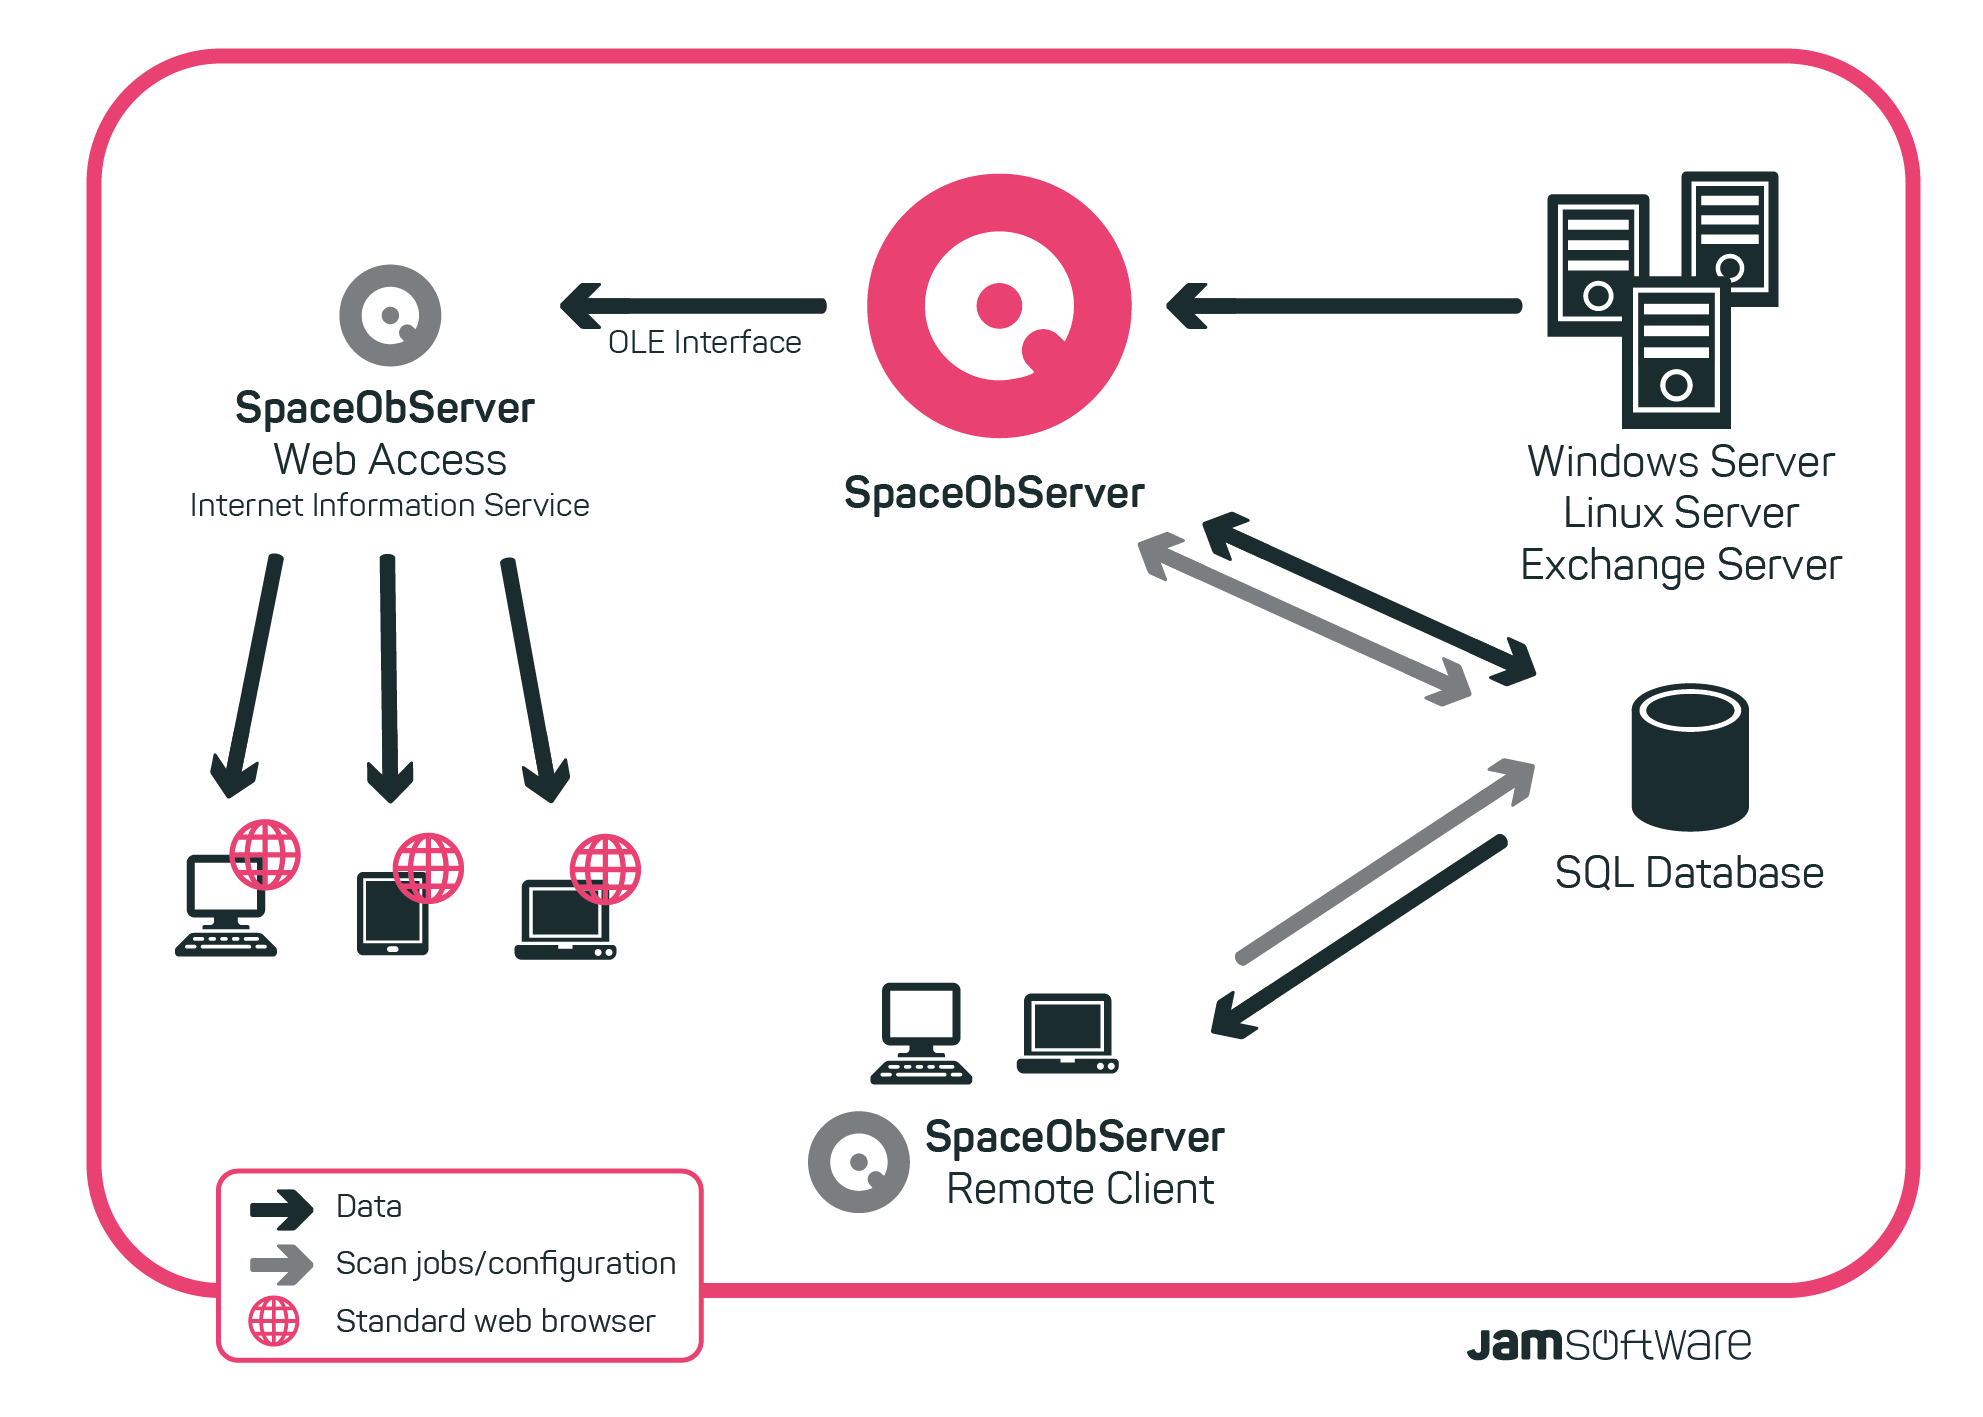
You can chose to install SpaceObServer directly on the server you want to scan, or install it on another machine with access to the file system you want to scan. The scans are always performed by the machine you installed SpaceObServer on. In case of remote scans, no additional software is needed on the file server you want to scan.
The “SpaceObServer Client Access” is typically installed on end use PC’s (e.g. the administrator’s PC) and connects to the database you stored the scan information in.

Please find information about how to get started with using SpaceObServer in the chapter “Quickstart”.
Please also note the chapters “Recommended Settings” and “SpaceObServer scan service”.