Step 1: Create a sender's profile
Follow these steps:
1.Start SmartSerialMail and choose '![]() Profile' in the navigation.
Profile' in the navigation.
2.Click '![]() New' to open the profile wizard and create a new profile.
New' to open the profile wizard and create a new profile.
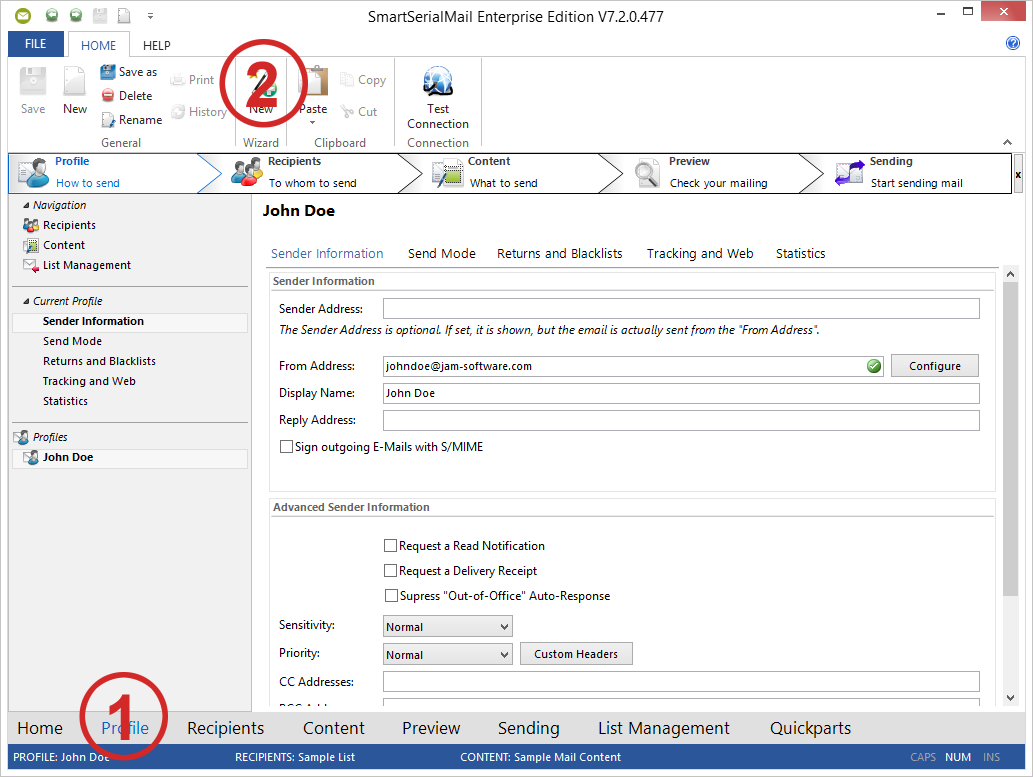
The Profile Wizard helps you to create a sender profile.
In the first step you have to insert your name and mail address.
Furthermore, you have the possibility to change to the manual configuration mode to set the server settings on your own.
Otherwise SmartSerialMail tries to find the required settings automatically.
Click 'Next' to proceed.
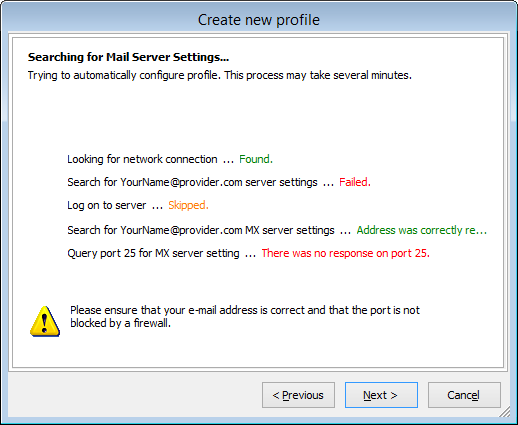
SmartSerialMail now tries to determine the configuration of your provider.
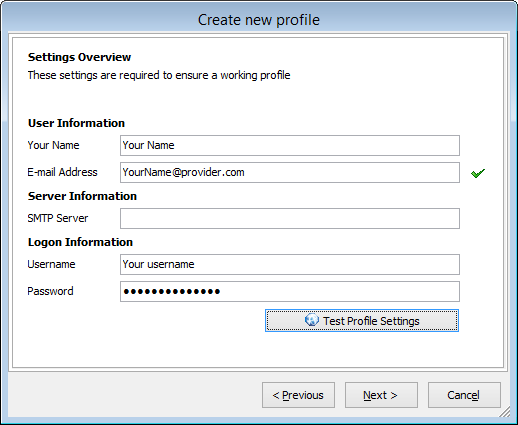
In the picture below you can see an overview of all collected data, which will be saved in SmartSerialMail.
Finally enter here your username and password for the selected mail-account.
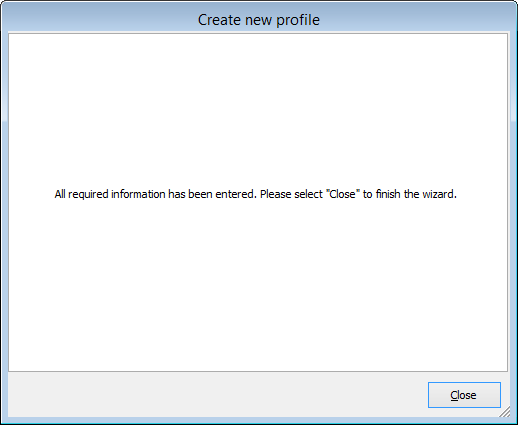
Click on 'Close' to get back to the main window of SmartSerialMail.
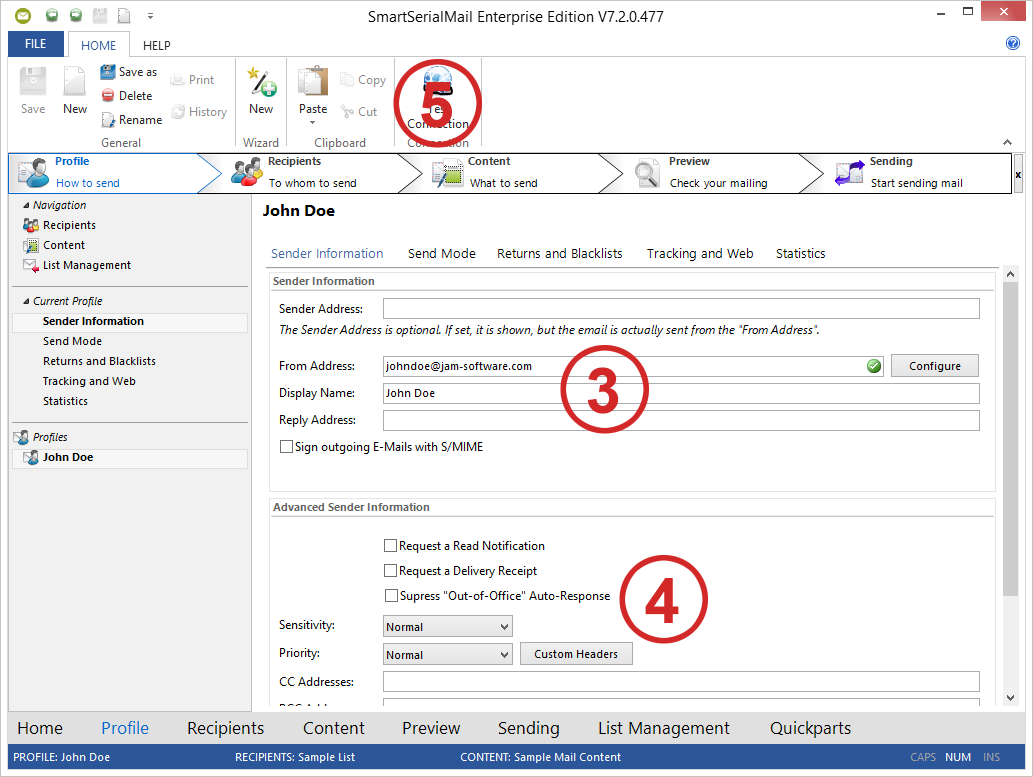
3.As 'Reply Address' enter the address where you want to receive the returns.
If not specified, the 'From Address' will be used for returns.
4.In 'Advanced Sender Information' you can apply additional settings to your current profile.
5.Click on the button '![]() Test Connection' in the 'Home' toolbar to check if your settings work.
Test Connection' in the 'Home' toolbar to check if your settings work.
A test e-mail will be sent to the 'From Address'.
You can create another profile in the same way.
To switch between your profiles use the 'Profile menu' on the left.
You can get detailed information in the help files under 'Profile'.
Step 2: Import a recipients list out of excel
Follow these steps:
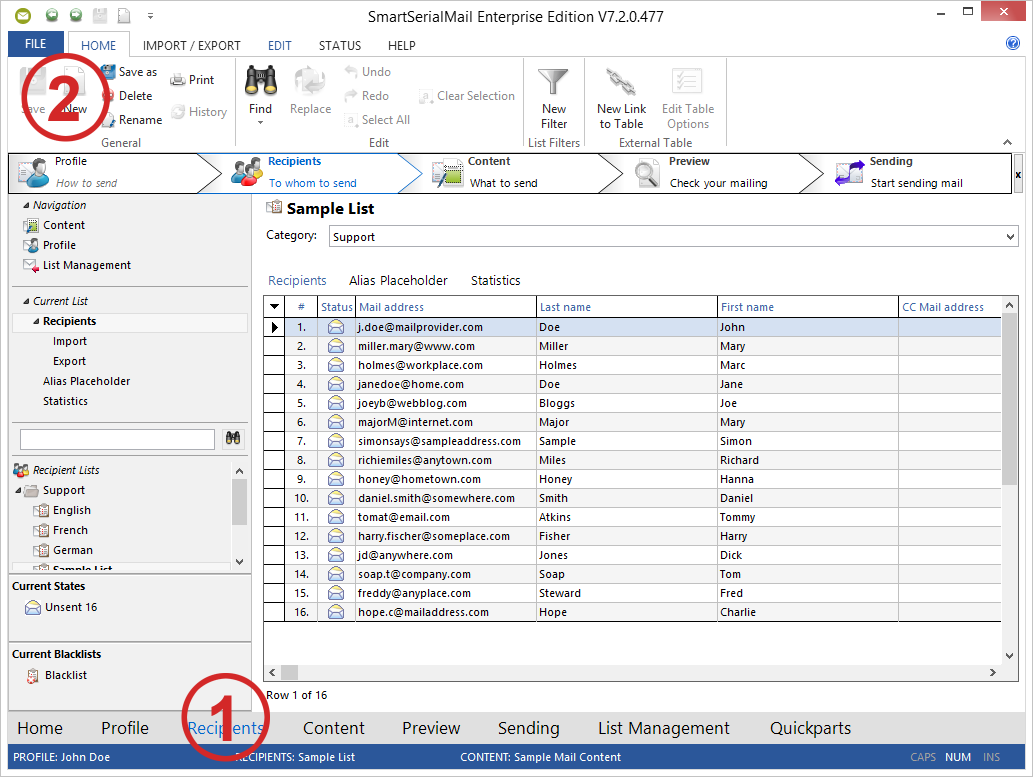
1.Choose '![]() Recipients' in the navigation.
Recipients' in the navigation.
Select the toolbar 'Home' if not selected already.
2.Click on the icon '![]() New' and insert a name for your list, e.g. 'Newsletter'.
New' and insert a name for your list, e.g. 'Newsletter'.
3.Select the toolbar 'Import Export' and click on the button '![]() Import Wizard' to open the 'Import Wizard'.
Import Wizard' to open the 'Import Wizard'.
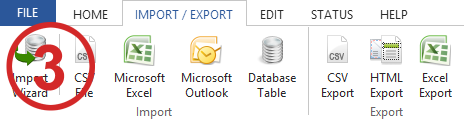
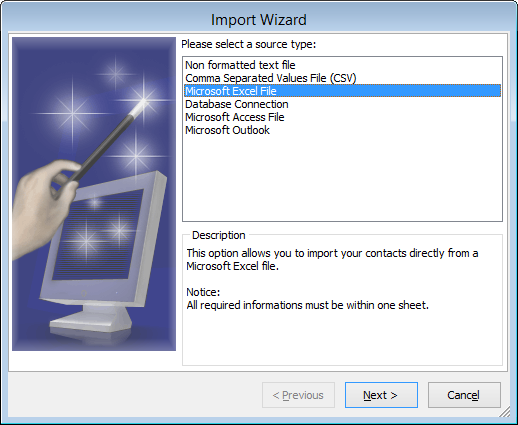
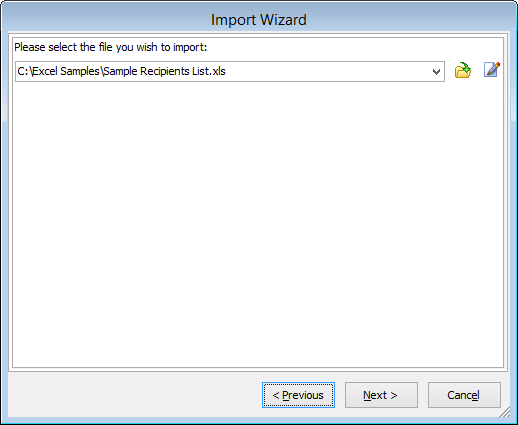
4.Choose as source type 'Microsoft Excel File'.
5.Use the '![]() Open' button to browse your file system and select a file or type the path into the text field.
Open' button to browse your file system and select a file or type the path into the text field.
With the '![]() Edit' button you can open and edit the selected file.
Edit' button you can open and edit the selected file.
|
Close the file to ensure a correct import. |
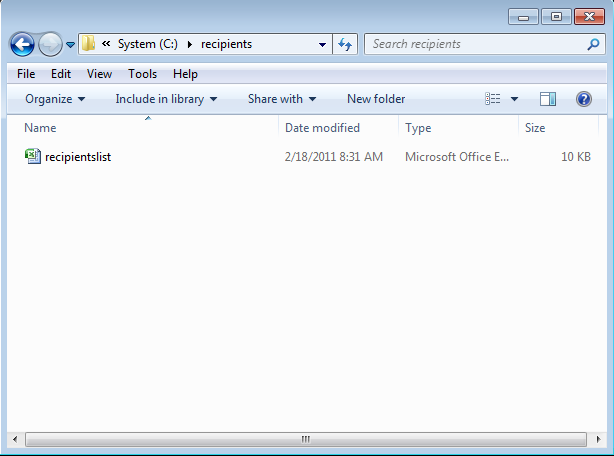
6.In this picture you can see an exemplary 'Open-Dialog'.
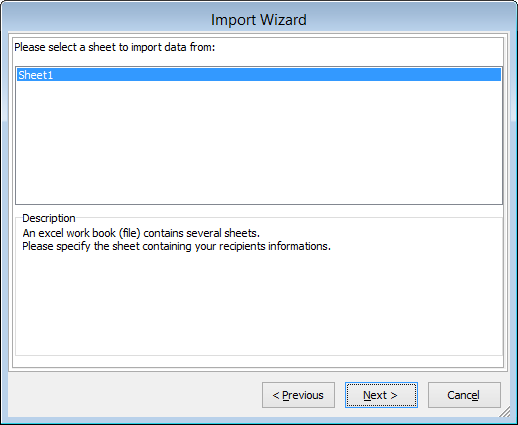
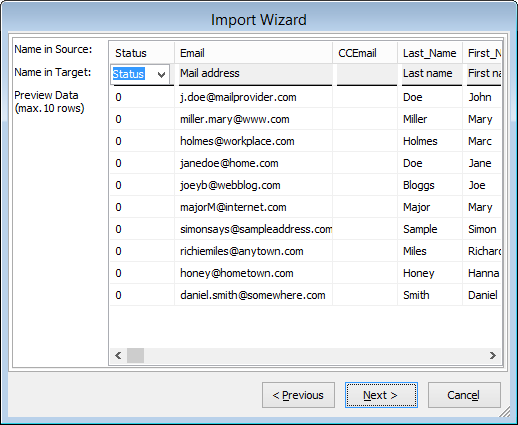
7.Choose the spreadsheet, which you want to import from.
8.State at which row the import has to start. This is important to avoid importing headlines as recipients.
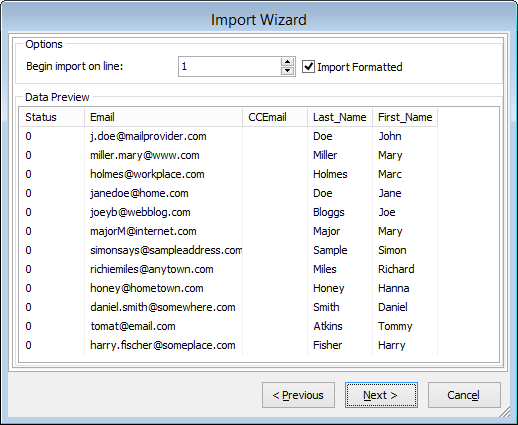
9.Select which columns should be imported and which headline each will have.
|
'Mail address' is a mandatory field. If you don't set 'Mail address' you can not send E-Mails to this list. |
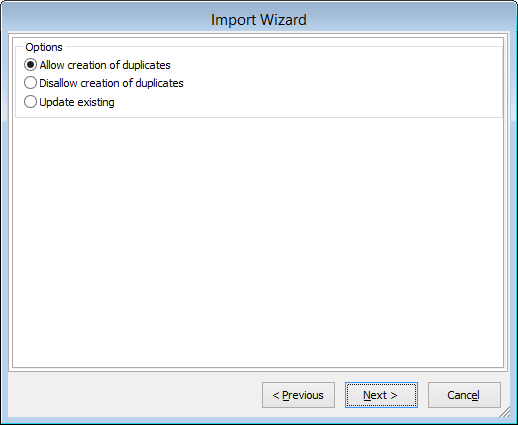
10.Select if you want to import duplicate entries or not, or if already existing entries shall be updated (non existing entries will be imported as well).
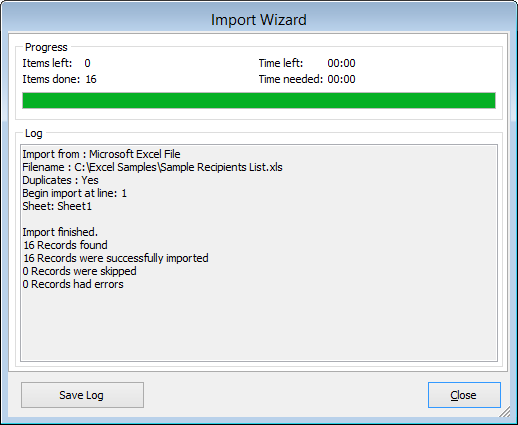
11.The recipients will be imported. Finally you can see in the log window if all entries have been imported correctly.
Choose 'Save' to save the log as text file.
Choose 'Close' to finish Import.
12.After the successful import you will see the recipient list.
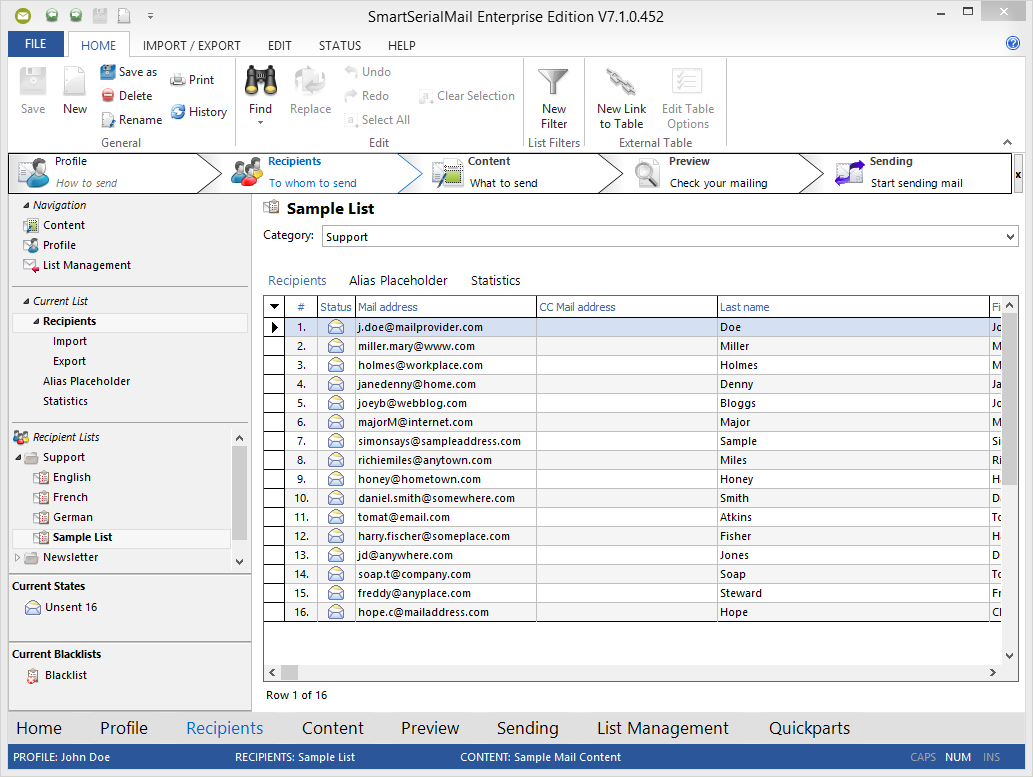
You can get detailed information in the help files under 'Recipients'.
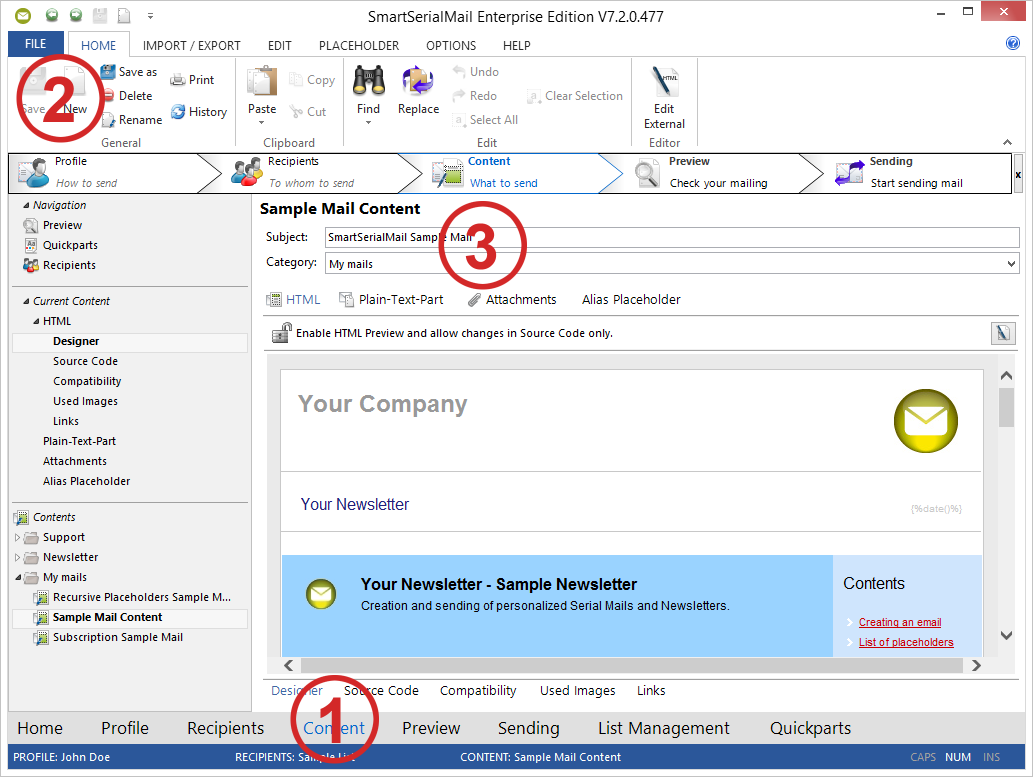
Step 3: Create a new message
Follow these steps:
1.Choose '![]() Content' in the navigation.
Content' in the navigation.
2.Click on the icon '![]() New' and insert a name for your new message, e.g. 'customer newsletter'.
New' and insert a name for your new message, e.g. 'customer newsletter'.
SmartSerialMail will save the message under the given name for reference.
3.Insert a 'Subject' for your message, e.g. 'customer newsletter'
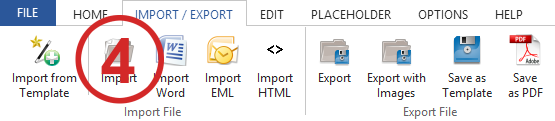
4.You can import a complete text in the editor, e.g. a word-file.
To do so, select the 'Import / Export' toolbar and click on the button '![]() Import' and choose the corresponding file from your working directory.
Import' and choose the corresponding file from your working directory.
You can get detailed information under 'Tutorial 4: Import content from Word'.
It is also possible to insert and edit your text as in a common word processor.
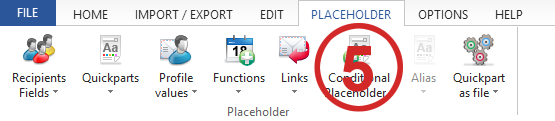
5.To give every e-mail a personal touch you can insert a quick part, e.g. for the last name ({%Last_name%}).
For this select the 'Placeholder' toolbar and click on the button '![]() Conditional Placeholder'.
Conditional Placeholder'.
6.To add attachments, first switch to the tab 'Attachments' in the editor, then select the 'Attachment' toolbar and click on the button '![]() Add File' and choose the corresponding file from your working directory.
Add File' and choose the corresponding file from your working directory.
|
For large files it could be better to provide the file on a server and only send the link in the mail. |
You can get detailed information in the help files under 'Content'.
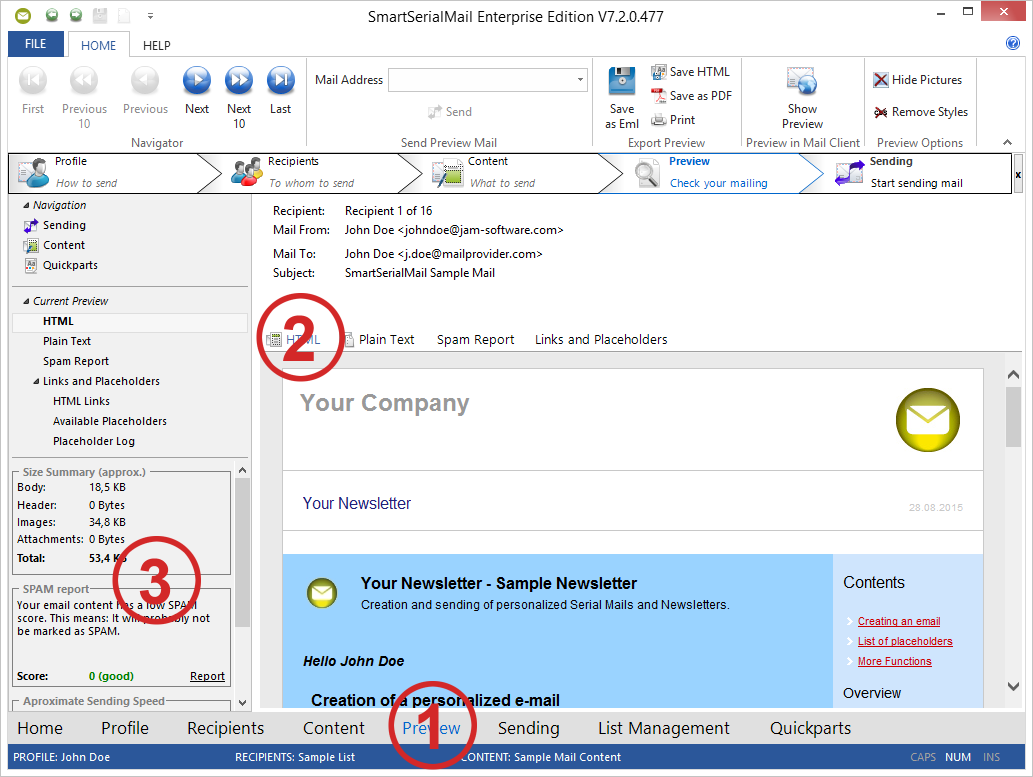
Step 4: Check the message
Follow these steps:
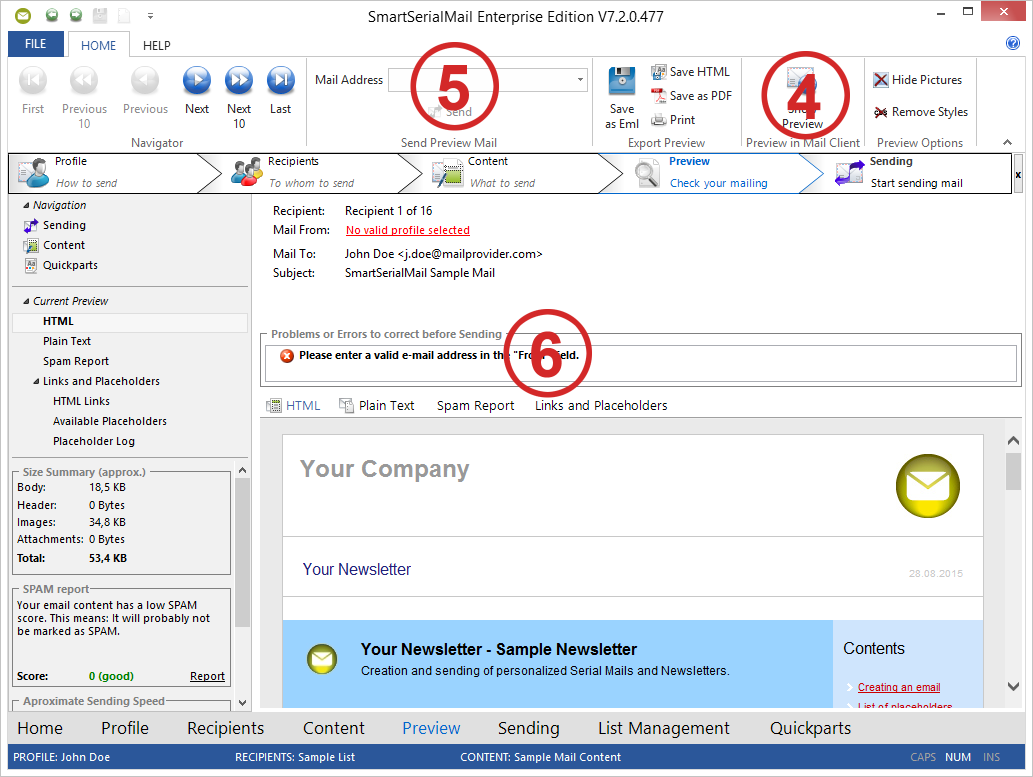
1.Choose '![]() Preview' in the navigation.
Preview' in the navigation.
2.'![]() HTML' tab shows you the preview of your mail in HTML format.
HTML' tab shows you the preview of your mail in HTML format.
3.On the left side of the preview the size and the estimated sending time is shown.
|
All values shown here are approximations only. The true duration of transmission depends on too large a number of factors, as it could be determined exactly, without knowing all influencing factors. |
4.To be sure that the e-mail will be displayed correctly, you can open it in the standard e-mail client of windows.
For this, click the '![]() Show Preview' button in the 'Preview in Mail Client' on the 'Home' toolbar.
Show Preview' button in the 'Preview in Mail Client' on the 'Home' toolbar.
|
On most systems this will be Outlook Express / Windows Mail (on Vista systems), even if you are working with a different mail client. |
5.You can also send a test mail to your own e-mail address.
For this, click the '![]() Send' button in the 'Send Preview Mail' group on the 'Home' toolbar.
Send' button in the 'Send Preview Mail' group on the 'Home' toolbar.
|
The message will not be sent to an address on your recipient list but only send to the e-mail address you typed in. |
6.Correct, if necessary, all problems and errors, you see in the list.
7.Click on the '![]() Plain Text' tab to get a preview of your mail in plain text format.
Plain Text' tab to get a preview of your mail in plain text format.
You can get detailed information in the help files under 'Preview'.
Step 5: Send the message
Follow these steps:
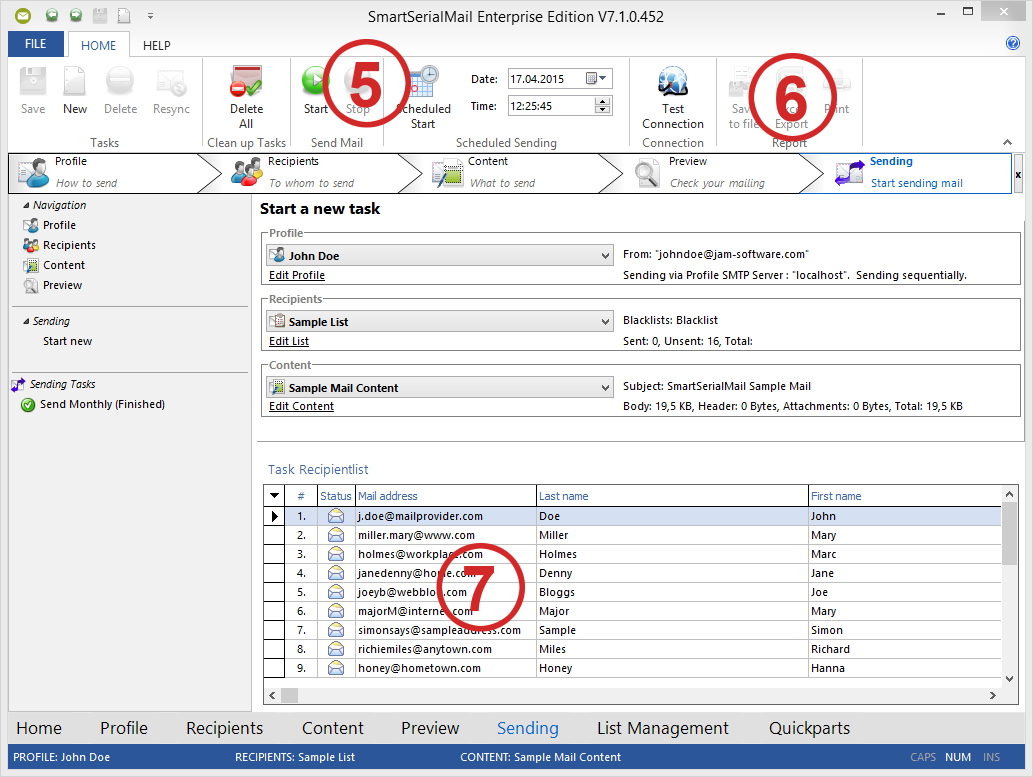
1.Choose '![]() Sending' in the navigation.
Sending' in the navigation.
2.Click on the '![]() New' button to create a new sending task.
New' button to create a new sending task.
3.If you want to start an existing task again you can select the task in the 'Send Mail' menu on the left.
4.Choose the profile, recipient list and mail you want to send.

5.Select '![]() Start' if the sending should start directly or '
Start' if the sending should start directly or '![]() Start Scheduled' for scheduled sending task at a specific date and time.
Start Scheduled' for scheduled sending task at a specific date and time.
|
Please note that this feature is available in SmartSerialMail Enterprise Edition only. |
6.Every transmission is logged.
If an error occurs, the log file can help you to find out what went wrong.
You can save the log to a TXT-file or print it.
7.The specific recipients list of the task is saved.
You can check which status the recipients have after sending.
You can get detailed information in the help files under 'Sending'.