Using File Search
The TreeSize File Search offers the ability to search for obsolete files or perform a highly customizable search.
You can open the File Search via the Windows “Start” menu or the “Tools” ribbon tab in the main application.
Below, you can find the most important elements of the TreeSize File Search window:
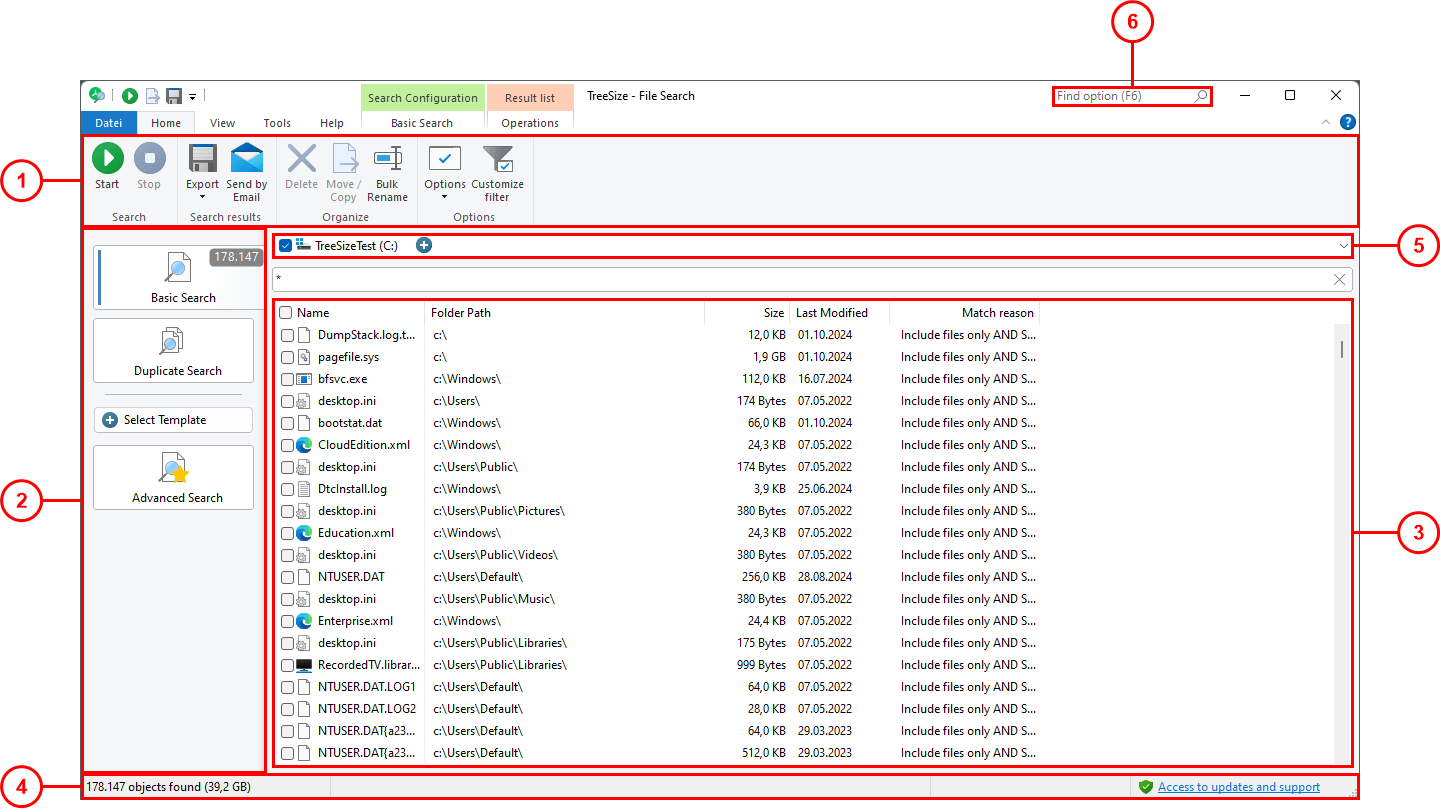
1 Ribbon Bar
The Ribbon Bar provides access to all commands of the TreeSize File Search.
It is divided into logical sections containing commonly used functions and elements (e.g. the “Home” tab), or the tabs enabling you to customize the appearance of the search results (e.g. the “View” tab ).
Press the “Start” button to start searching with the currently selected search options in the selected Search paths.
2 Search Types
TreeSize offers the following file search types:
Basic Search
Duplicate Files
Advanced Search
Use the check box to activate a certain search type. When a new search is started, all activated searches will be executed, after which the number of results will be displayed.
After the search has been completed, select a search type (click on the caption) to show the search results of this search (See 3).
3 Results List
In the center of the window, the result list of the search type you selected at 2. is shown. Files and folders that have been found, can be selected, or checkmarked here.
You can customize the amount of information shown by right-clicking the header of the list. This opens a context menu that provides a selection of predefined columns. Additional columns are available through a selection dialog (“More columns”). TreeSize supports all columns that are available in Windows Explorer.
A detailed description of the different columns can be found here: Available columns.
4 Status Bar
The status bar sums up information regarding the currently shown search results.
Potential errors during the search, such as missing permissions, will be shown in this panel as well.
5 Search Paths
The bar “Search in:” shows the drives and paths that will be used as starting point for the search, one tile per target.
Use the check box of a tile to include a target in the next search or to leave it out, and the plus button to add a further one. The drop-down at the end of the bar offers the paths you used before, your favorites among them, and all drives.
A detailed description can be found here: Search paths.